| Newer articles can be found at http://rigmarolestudio.com |
Sliding and Bulging Effects Using Soft Mods in Maya
Posted on November 28, 2016 - category: character-rigging
In this Maya rigging tutorial, you will learn how to animate the falloff center of a Soft Mod. This lets you animate a bulge moving along an object.

I worked as the character rigger on a fantastic short film called “Majora’s Mask - Terrible Fate” by Ember Lab. I used Soft Mods in Maya to create a bulging effect in the Mask Salesman’s backpack. This makes it look like objects are bouncing around inside the fabric. By connecting it …
Continue readingUsing Edge Slide and Falloff to Fix Lip Topology in Modo
Posted on May 19, 2015 - category: character-rigging
Here is a new character I’ve been working on. I’m modelling him to be rigged and animated along with a face rig. The base sculpt and colors were done in 3D-Coat. I used voxel painting to lay in some rough colors without needing UVs.
Now I’m taking it into Modo to do some more technical topology clean up, and I’ll finish the UVs and texture maps in Modo. I’m quite new to Modo, but I …
Continue readingA New Demoreel & My Cartoony Face Rig Structure
Posted on September 09, 2013 - category: character-rigging
I just got back from an awesome summer vacation, travelling in South America! Now I’m back to work, developing some new Python animation tools and plugins (which I’ll blog about soon) and looking for new clients and projects for the coming year! Today I want to show you my new character rigging demoreel. It has a few highlights of my tech artist work from this past year. After the video, you’ll read a bit about the facial …
Continue readingManually Create a Single Maya Follicle in Python
Posted on February 22, 2013 - category: character-rigging
Do you use Maya follicles to pin objects to your geometry? Are you still doing it the old way, by creating a Hair System and then deleting all the parts you don’t need? Below I’ll share my simple Maya Python script that creates and pins a single follicle onto a nurbs surface. (Jump straight to the script.)
I love using follicles. They adhere to a nurbs or poly surface and they maintain a good, predictable orientation in normal …
Continue readingHow To Stop Collapsing Vertices in Maya Post Normalization
Posted on May 14, 2012 - category: character-rigging
So this is annoying. You are trying to paint weights in Maya using Post Normalization and a bunch of your vertices are collapsing to the origin! What’s going on!?
Don’t fret. There is a simple explanation and an easy fix for this. But first, let’s look at what Post skinning is doing:
“What is this Post Normalization skinning all about?”
When using Post Normalization skinning for the first time, it can be a bit tricky to figure …
Continue readingUsing a Unit Vector to Make a Cylindrical Foot Roll
Posted on April 03, 2012 - category: character-rigging
Here is a tutorial that will demonstrate how to use a Unit Vector to animate the pivot point of a cylinder so that the cylinder will roll on its bottom edge in any direction. I’m using this technique for the feet of my Mini Mammoth rig, but it could also be useful for robot feet, or adapted into different shapes for a variety of uses.
Here is a video of the foot rolling effect we are going to create …
Continue readingMini Mammoth Part 3: Modelling and Topology in 3D-Coat
Posted on March 05, 2012 - category: character-rigging
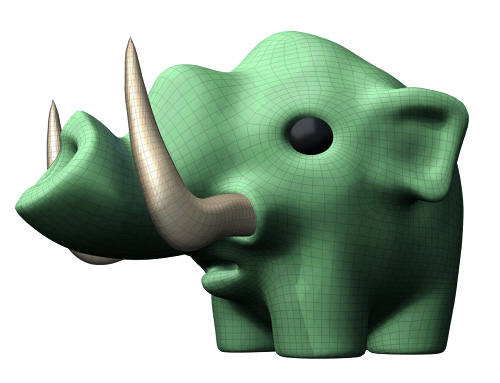
Here is Part 3 of rigging Mini Mammoth. I’ve now got a finished model. This turned into a huge step, because I was learning a ton about modelling and topology in 3D-Coat, which turned into a 2-week long adventure of tutorials and manuals. I made a lot of mistakes as well which I’ll talk a little bit about. All in the spirit of learning!
This is the last post before I get into the actual character rigging.
First …
Continue readingUsing Proxy Geometry For Better Skinning Results
Posted on February 10, 2012 - category: character-rigging
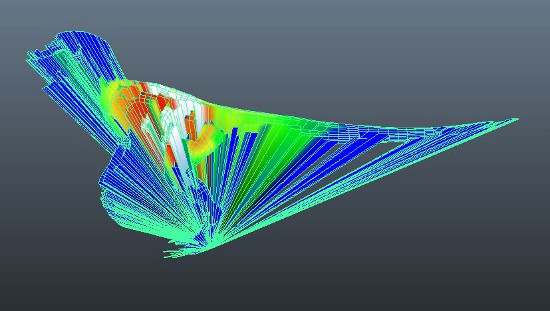
Here is a simple skinning trick I like to use, which comes in handy for a lot of different rigging situations.
In the images below, I was rigging a wolf’s tongue with spline IK that needed to be very flexible. (If you count, you’ll notice that there are 12 controllers. 4 main controllers and 8 extra offset controllers to bend and twist the tongue into a variety of shapes.) The skinning was proving to be tedious, because the …
Continue readingMini Mammoth Part 2: Sketching & 3D Sculpting
Posted on January 23, 2012 - category: character-rigging
So now we are on to part 2 of the Making Of Mini Mammoth where I am documenting the entire process of designing a cartoony character rig. In this step, I am doing a bunch of sketching from photo references and sculpting a quick prototype 3D model to get even more ideas. We’re almost ready to start the actual modelling, but first…
Sketching Solves Problems
Design-based drawing is ultimately about solving problems, so quality isn’t at all important …
Continue readingMini Mammoth Part 1: The Making Of A Cartoon Character Rig
Posted on January 17, 2012 - category: character-rigging
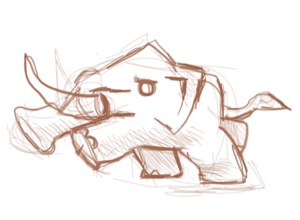
Hi everyone. This is the first post in a series where I take this simple doodle of a cartoon mammoth:
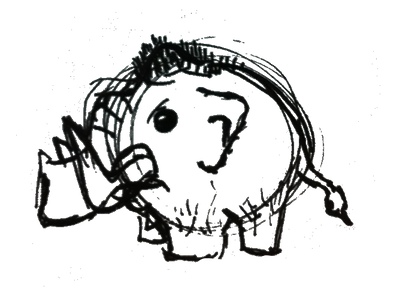
…and turn him into a fully animated, super-flexible cartoony character rig in Maya!
I’ll be documenting the entire process from design and modelling to the creation of the entire rig. It won’t be a step-by-step tutorial, but it will show my entire thought process as I rig, mistakes and all. It might get messy, but I know I …
Continue reading| Newer articles can be found at http://rigmarolestudio.com |