Sliding and Bulging Effects Using Soft Mods in Maya
Posted on November 28, 2016 - category: character-rigging
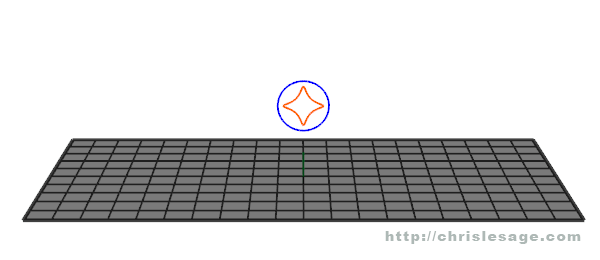
In this Maya rigging tutorial, you will learn how to animate the falloff center of a Soft Mod. This lets you animate a bulge moving along an object.

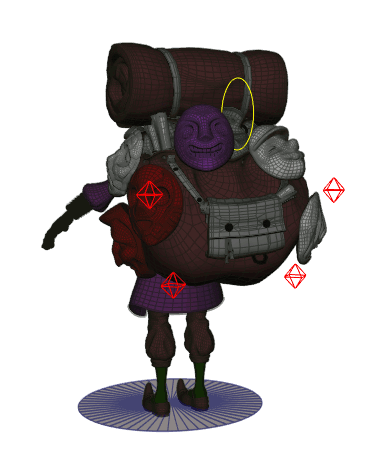
I worked as the character rigger on a fantastic short film called “Majora’s Mask - Terrible Fate” by Ember Lab. I used Soft Mods in Maya to create a bulging effect in the Mask Salesman’s backpack. This makes it look like objects are bouncing around inside the fabric. By connecting it to controllers, it makes it very animator-friendly.
Why Soft Mods?
Soft Mods and Lattices have some very interesting properties. They are non-linear deformers that you can easily shape and manipulate. You can also move geometry through their deformer space.
This lets you create some nice bulging, sliding and bending effects that you can move along your geometry using controllers. In a future tutorial, I’ll show you how you can use lattices in similar clever ways.
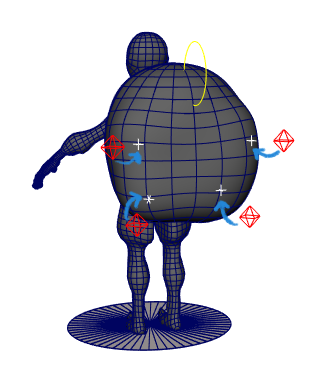
The Mask Salesman’s backpack rig uses 4 Soft Mods. Each controller has attributes to animate the size and strength of the bulge. By making it small, it looks like an object bouncing around inside the bag. By making it large, it can look like the entire bag has some nice dynamic bounce, without needing a real simulation.
Other Examples
Here are some other examples of ways I’ve used this in rigs. I’ll show some of this in future tutorials.
- Create a bend in a creaky old piece of wooden flooring, wherever the character steps down on the floor. The animator can choose where the bend will happen for each footstep.
- A character grabs and slides open a window curtain. The animator was able to create a fairly convincing shape, and that animation was sent to the cloth simulation department for some extra finesse.
- Hiding the end of a rope inside a machine as it coils up using a lattice.
- Create a cartoony water-hose effect through a hose or a character.
How to set this up
-
Select the geometry you want to deform, or select some vertices on the geometry.
-
Create a softMod deformer with the default options. Click Deform -> Soft Modification. You’ll edit the radius and other parameters with controls later.
-
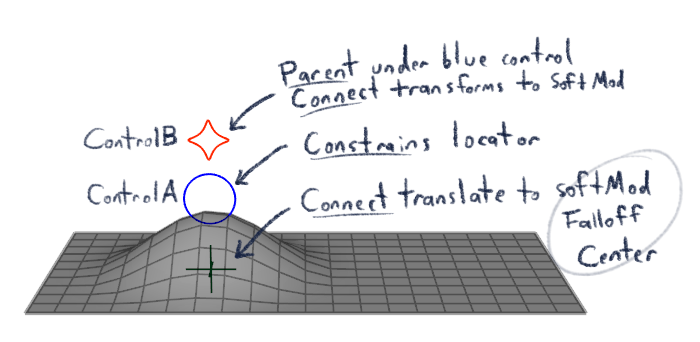
Create 2 controllers. ControlA is going to slide where the Soft Mod center begins. ControlB will move the Soft Mod handle. Parent ControlB under ControlA. Also create a locator. Keep the locator in world space for now.
-
Parent constrain the locator to follow ControlA with “Maintain Offset” turned off.
-
Connect locator.translate to the softMod1.falloffCenter. Your goal here is to get the world position of ControlA. Since the locator follows the control, it is essentially giving you the world position. Depending on your skill level, you can also use utility nodes to get the world position of ControlA.
-
Connect ControlB.translate to softMod1Handle.translate and ControlB.rotate to softMod1Handle.rotate. You will want to use a connection instead of a constraint, or you will get double-transformations on the Soft Mod.
-
Add attributes on ControlB so the animator can animate the envelope and the radius of the Soft Mod without having to select the Soft Mod. I suggest you use animator-friendly names like “strength” and “size”. Connect strength to envelope. And size to radius. You can then hide the Soft Mod Handle.
Here is a Maya scene file to download and study.
Some advanced tips to take this further
Attach it to a surface
In the backpack example, I used a geometry constraint to attach the Soft Mod to the contours of the backpack. This lets the animators slide it along the backpack. The control can move anywhere, but the world-space locator from step #5 is constrained to the surface of a nurbs sphere that is roughly modelled to the shape of the backpack.
Control where the Soft Mod gets created
If you want to control where the default position of the Soft Mod will be, start by selecting a few vertices at that position. The Soft Mod handle will be created at the center of your vertex selection. Then, you can add the rest of the vertices later using the “Edit Membership Tool”.
Cartoony rubber hose effects
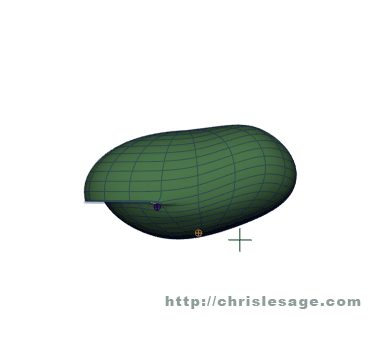
If you want to make a cartoony rubber-hose effect, use a path constraint to attach the locator to a curve that follows the hose. Or use deformation order to move the Soft Mod along a straight hose before bending it with your other controllers. Here is a rough rig prototype for a cartoony character.
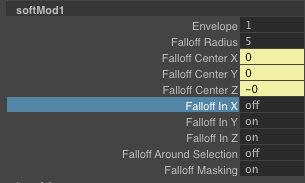
Control the falloff effects
Experiment with the falloff settings of the Soft Mods to get more linear effects. For example, by turning off Falloff X, you can get a different effect than just a simple round bump.
The setting for falloff is found on the Soft Mod deformer. If you need a very specific shape, sometimes a lattice works better.
Thanks for reading!
Thanks for reading! If you have any questions or comments about these steps, feel free to send me a message on my contact form. Want to learn more rigging techniques and tips like this? Make sure to sign up below.