Mini Mammoth Part 1: The Making Of A Cartoon Character Rig
Posted on January 17, 2012 - category: character-rigging
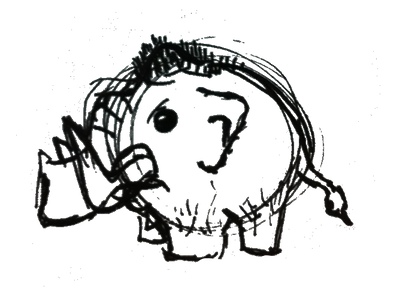
Hi everyone. This is the first post in a series where I take this simple doodle of a cartoon mammoth:

…and turn him into a fully animated, super-flexible cartoony character rig in Maya!
I’ll be documenting the entire process from design and modelling to the creation of the entire rig. It won’t be a step-by-step tutorial, but it will show my entire thought process as I rig, mistakes and all. It might get messy, but I know I’ll learn a lot and hopefully you will too.
This isn’t the full “design”. That will come a bit later. Right now it is just a quick 3-inch doodle that I sketched while at work. I am choosing this funny little character for a few reasons, because it will be especially challenging in a few ways:
The Challenge
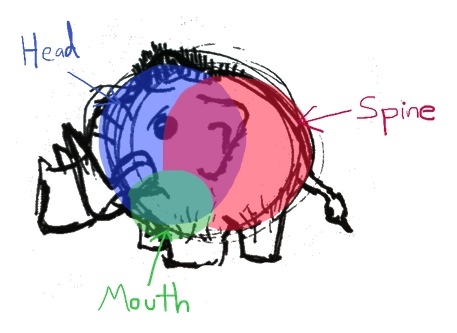
1. The challenge of small cartoony rigs is that there is lots of overlapping influence between the different body parts. Take a look at this image.

For example, the cavity of the mouth and the shape of the lips is going to overlap all the way down to his knees. So when he opens his mouth his legs are going to move! His head is so big in relation to his body that he is basically a walking face. When rigging a normal-sized human or creature, all the body parts are distinct and separate and it is easier to paint the influence. So I am going to have to very carefully consider how I do everything from the facial rig to the way the limbs bend the body.
2. I am going to design him so that he has a lot of exaggerated squash and stretch. His trunk will stretch, bulge and grab on to things. How will such a short little trunk grab things? We will see!
3. It will just be a lot of fun figuring out how to make this guy move in an appealing and believable way!
The End Result?
The end result will be an animated short, featuring “Mini Mammoth”. I am not sure yet if I am going to texture and render it, but we will see! Stay tuned!
This post is part 1 of the "mini-mammoth" series: